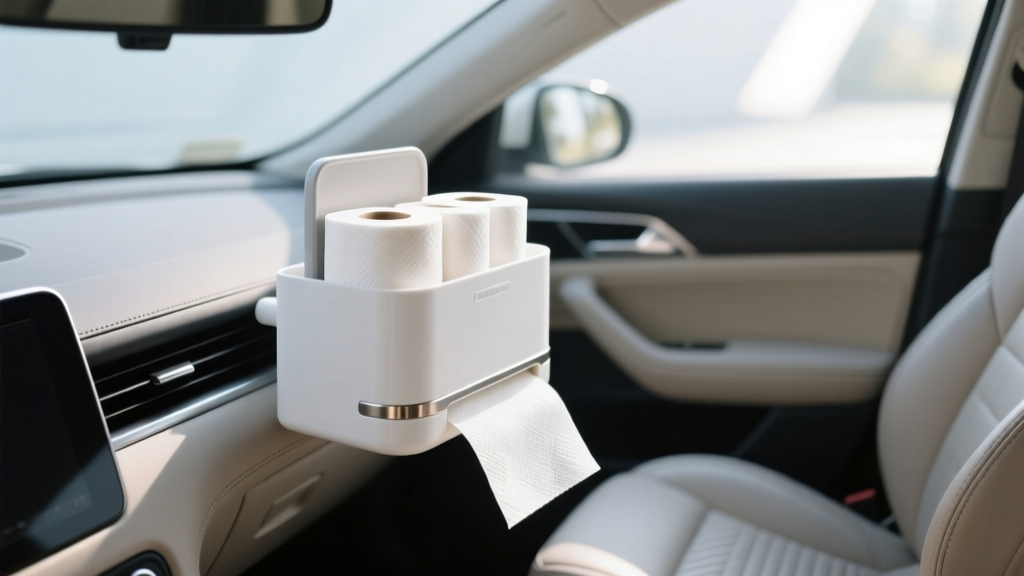
Paper Towel Mount Maintenance (2026)
A paper towel mount inside your vehicle sounds like a small accessory?until you?ve lived with one for a few months. When it?s clean, solid, and positioned correctly, it turns quick cleanups into a one-hand job: coffee drips on the console, fingerprints on the infotainment screen, wet dog paws on door sills, or a surprise spill in the back seat. When it?s loose, squeaky, or gummed up with dust and adhesive residue, it becomes one more rattling annoyance that can scuff trim and ruin your ?clean interior? vibe.
This guide is for car owners and enthusiasts who want their paper towel holder (visor-mounted, headrest-mounted, seat-rail, console, or adhesive-mounted) to last?without damaging interior plastics, leather, vinyl, or upholstery. You?ll learn how to inspect, clean, tighten, and re-secure common mount types, plus how to avoid the mistakes that lead to sagging towels, broken clips, and sticky residue that never seems to fully go away.
Along the way, you?ll get practical tips, real-world examples (like what happens to adhesive mounts in summer heat), and product suggestions for cleaners and mounting upgrades that work well in automotive interiors.
Why Paper Towel Mount Maintenance Matters in a Car Interior
- Heat and UV are brutal on plastics and adhesives: A mount that feels solid in spring may soften or slide in summer when cabin temps spike.
- Interior dust is abrasive: Dust and grit collect in hinges, clips, and ratchets, causing squeaks and premature wear.
- Rattles are amplified in cabins: A slightly loose bracket can sound like a major interior rattle over rough roads.
- Trim damage is expensive: A shifting mount can scuff piano black panels, soft-touch plastics, or leather.
- Hygiene: Paper towels live close to spills, hands, and food. Grimy mounts can transfer residue back onto ?clean? towels.
Know Your Mount Type (So You Maintain It Correctly)
Paper towel mounts for cars typically fall into one of these categories. Identifying yours helps you choose the right cleaning method and avoid accidental damage.
1) Adhesive-Mounted Holders (Dash, Console Side, Cargo Panel)
- Pros: Clean look, easy access, no drilling
- Cons: Adhesive can fail in heat; residue is common; may mar delicate trim
2) Headrest Post Mounts (Rear of Front Seat)
- Pros: Great for family vehicles; keeps towels away from dash
- Cons: Can wobble if clamp is loose; can rub seatback upholstery
3) Visor Clips or Over-Visor Bands
- Pros: Convenient for driver; minimal space used
- Cons: Can stress visor fabric and hinge; may block vanity mirror
4) Seat Rail / Under-Seat Brackets
- Pros: Hidden, stable, less visual clutter
- Cons: Harder to access; can interfere with seat movement if poorly placed
5) Cupholder/Console Insert Holders
- Pros: Easy install; no adhesive; removable for cleaning
- Cons: Uses storage space; can tip if tall roll and aggressive driving
Quick Inspection Checklist (Monthly, or After a Big Spill)
Do this quick check in 2?3 minutes to catch issues early:
- Wiggle test: Hold the mount and gently rock it. Any movement means tightening or re-securing is needed.
- Look for rub marks: Check nearby trim for scuffs, shiny spots, or wear patterns.
- Check the roll tension: If towels free-spin or tear unevenly, the tension mechanism may be dirty or worn.
- Inspect adhesive edges: For adhesive mounts, look for lifting corners, bubbles, or dust buildup along the perimeter.
- Listen for squeaks/rattles: Drive over a rough patch and note if noise comes from the mount area.
Step-by-Step: Cleaning the Mount Without Damaging Interior Surfaces
Most mounts fail early because they?re cleaned with the wrong chemical (or not cleaned at all). Use a gentle approach first, then step up only if needed.
What You?ll Need
- Microfiber towels (2?3)
- Soft detailing brush or old toothbrush
- Mild interior cleaner (pH-balanced) or diluted all-purpose cleaner safe for interiors
- 70% isopropyl alcohol (for adhesive prep and stubborn grime; spot test first)
- Cotton swabs for crevices
- Optional: compressed air (careful around loose fibers and vents)
Step 1: Remove the Paper Towel Roll
- Take the roll out and set it aside in a clean area.
- If the roll is damp or smells musty, replace it. Paper towels absorb cabin odors fast.
Step 2: Dry Dust First
- Use a brush to loosen dust in hinges, clips, and ratchets.
- Wipe away loosened dust with a dry microfiber.
Real-world example: A headrest-mounted holder often develops a ?grinding? feel when you pull towels. That?s usually dust and grit sitting where the spindle rotates.
Step 3: Light Cleaning Pass
- Spray interior cleaner onto a microfiber (not directly onto the mount, especially near screens or porous fabrics).
- Wipe the mount surfaces, focusing on touch points and edges where grime builds.
- Use cotton swabs for tight corners.
Step 4: Tackle Sticky Residue (If Needed)
- Spot test 70% isopropyl alcohol in a hidden area if the mount contacts interior trim.
- Dampen a microfiber lightly and wipe residue. Avoid soaking.
- For stubborn adhesive smears, repeat with light pressure rather than scraping.
Tip: Avoid harsh solvents (acetone, lacquer thinner) inside a car. They can haze plastics, soften soft-touch coatings, and discolor vinyl.
Step 5: Dry and Reinstall
- Buff dry with a clean microfiber.
- Reinstall the roll and test the pull action. It should feel smooth and controlled.
Step-by-Step: Tightening and Re-Securing Common Mounts
Adhesive Mounts: Re-Bonding for Heat Resistance
If your adhesive mount is sliding, lifting, or falling off, don?t just press it back down. Dust and interior dressing oils prevent a lasting bond.
- Remove the mount carefully: Warm the adhesive with your hand or a gentle cabin-warm environment. Slowly peel to reduce trim damage.
- Remove leftover adhesive: Use adhesive remover safe for automotive interiors, or carefully use isopropyl alcohol. Work slowly.
- Degrease the surface: Wipe the mounting area with isopropyl alcohol and let it fully dry.
- Upgrade the tape: Replace bargain tape with automotive-grade acrylic foam tape.
- Apply firm pressure: Press for 30?60 seconds and avoid loading the mount for 24 hours when possible.
Heat tip: Adhesives bond better when the interior surface is warm (not hot). If it?s winter, pre-warm the cabin for a few minutes.
Headrest Post Mounts: Stop Wobble and Seatback Scuffs
- Check clamp screws: Use the correct tool (often hex/Allen). Tighten snug?not ?gorilla tight.?
- Add a protective layer: If the mount touches the seatback, add a thin felt pad or soft rubber bumper to prevent abrasion.
- Align to prevent rubbing: The holder should sit centered and not press into upholstery during seat movement.
- Re-test after a drive: Some clamps settle; re-tighten slightly if needed.
Real-world example: On leather seats, a slightly angled headrest mount can create a shiny wear spot over time where it contacts the seatback?especially in SUVs where passengers brush past it.
Visor Mounts: Prevent Sagging and Fabric Damage
- Confirm fit: If the clip is too tight, it can crease the visor. If too loose, it will sag and rattle.
- Use a soft barrier: A thin microfiber strip between clip and visor can reduce wear and squeaks.
- Don?t overload: Choose a smaller roll or a compact towel pack to avoid stressing the visor hinge.
Seat Rail / Under-Seat Mounts: Keep Seats Moving Freely
- Slide the seat through full range: Forward/back, height, and recline to ensure no interference.
- Secure with threadlocker (optional): If bolts back out over time, a small amount of removable threadlocker can help.
- Watch for wiring: Modern seats have airbag and power connectors?never trap or pinch wiring under a bracket.
Product Recommendations and Smart Upgrades
You don?t need expensive products, but the right materials make a noticeable difference in durability and interior safety.
Best Tape for Adhesive Mounts
- Automotive acrylic foam tape (OEM-style): Handles heat cycles better than generic double-sided tape.
- Why it works: It conforms to slight texture in trim panels and resists softening.
Safe Cleaning Options for Mounts and Surrounding Trim
- pH-balanced interior cleaner: Good for plastic, vinyl, and sealed leather surfaces.
- Isopropyl alcohol (70%): Useful for degreasing before re-taping; use sparingly and spot test.
- Soft brushes and microfiber towels: Prevent micro-scratches on glossy plastics.
Better ?Roll? Options for Cars
- Compact paper towel rolls: Less weight and less leverage on clips/adhesive.
- Shop towel rolls (blue): Stronger when damp; great for trunk/cargo use, but can feel ?industrial? up front.
- Folded towel packs: Reduce rattles and fit in tight mounts; great for glovebox or seatback pockets.
Common Mistakes That Shorten Mount Life
- Mounting to freshly dressed panels: Interior shine products leave oils that kill adhesive bonds.
- Using harsh solvents: They can haze clear plastics and strip soft-touch coatings.
- Ignoring summer heat: A mount placed on a sun-baked dash panel is more likely to fail than one on a shaded console side.
- Over-tightening clamps: This cracks plastic brackets and can deform headrest posts or visor edges.
- Letting the roll bounce: If the roll can free-spin, it will rattle and stress the holder over bumps.
- Mount placement that causes interference: Seat movement, airbag zones, and shifting storage lids need clearance.
Placement Tips for a Cleaner Look and Better Durability
- Keep it out of knee zones: Driver comfort matters. Avoid the lower dash near knees and the console edge where legs rub.
- Avoid airbag deployment areas: Stay away from A-pillars, steering wheel area, and side curtain airbag paths.
- Choose ?low-UV? locations: Console sides, the rear of the center console, or cargo side panels often last longer than dash tops.
- Test with real use: Sit in each seat and simulate grabbing a towel. If you have to twist awkwardly, you?ll yank the mount harder over time.
FAQ: Paper Towel Mount Maintenance for Cars
How often should I clean my paper towel holder?
Light wipe-down monthly is a good baseline. If you use it for greasy wipes (snacks, sunscreen, engine bay touchups), clean it every 2 weeks to prevent buildup that makes the mechanism sticky.
My adhesive mount keeps falling off in summer. What?s the fix?
Remove it, fully clean off old adhesive, degrease with isopropyl alcohol, then reapply using automotive acrylic foam tape. Let it cure (no load) for about 24 hours if possible. Also consider relocating off the dash top to a shaded panel.
Is it safe to mount a paper towel holder on leather seats?
Yes, if it doesn?t rub. Use a headrest post mount that sits off the seatback, and add a small felt pad anywhere the bracket might contact leather. Check for shiny wear spots during your monthly inspection.
Why do my towels tear unevenly or unravel?
Usually it?s low tension or misalignment. Clean dust from the spindle/hinge area, confirm the roll is centered, and make sure any tension bar or spring is seated correctly. Switching to a smaller, denser roll also helps.
What?s better for a car: paper towel roll or microfiber towels?
Microfiber is better for screens and glossy trim because it reduces scratching risk. Paper towels are better for messy, disposable jobs (food spills, mud). Many enthusiasts keep both: a mount for paper towels and a small bag of clean microfibers for detailing-level wiping.
Can I use glass cleaner or disinfectant wipes on the mount?
Occasionally, yes, but be cautious. Some glass cleaners contain stronger solvents, and some disinfectant wipes leave residue that attracts dust. If you do use them, follow with a damp microfiber wipe and then dry.
Wrap-Up: Keep Your Mount Solid, Quiet, and Clean
A paper towel mount should make your car easier to live with?no rattles, no peeling adhesive, no scuffed trim. Build a simple routine: a quick monthly wiggle test, a gentle cleaning, and a smart re-bond or re-tighten when you notice the first signs of looseness. If your current setup constantly slips or interferes with daily driving, that?s your cue to upgrade the tape, switch to a lighter roll, or move the mount to a more interior-friendly location.
Next steps:
- Inspect your mount today using the checklist above.
- Clean the mount and the surrounding trim with a microfiber and interior-safe cleaner.
- If it?s adhesive-mounted, plan a proper re-tape using automotive acrylic foam tape for better heat resistance.
- Re-evaluate placement for safety, comfort, and long-term durability.
For more practical car interior tips?from cleaning and storage to smart accessories?browse the latest guides on carinteriormix.com.